Today I made beef stock. For some of you classically trained folks that may sound like the actions of a philistine. Great stock is made from veal bones we were taught by the chefs at culinary school (partly due to the much higher collagen content in the joints of young animals). The beef bones these days still have a readily available amount of collagen, so really, for me, it is the same product. Maybe better.
I'll be honest with you. Veal does not upset me. I understand that there is a bad aura around the idea of veal in the United States and I completely understand it. Not all veal is raised in the abhorrent conditions that created the issue, much less than in the past that's for sure, but that problem does still exist.
My use of veal comes really from the need to use veal product for my kitchen, the bones, the basis of the classical veal stock. If you know where your veal bones are coming from, you can make veal stock in a guilt free environment.
I don't really have a ready made source for veal bones so when we buy our beef from a local rancher, I usually buy some bones as well.
The folks that we purchase our beef from belong to a group that are held to very tight standards regarding animal husbandry, types of feed and the complete absence of growth hormones etc.
It's quality stuff.
We have been buying a quarter cow from one ranching family every year for the last 8-9 years and I could not possibly be more pleased with the quality of what we receive. These people care about the animals they raise and the quality is exceptional. They are also some of the nicest people that I have ever met, great folks.
The point of using veal bones for stock is due to the much higher collagen content available in younger animals as opposed to using the bones of older ones. Again, as I have said before, gelatin content in your stock is important, but it can be attained with beef bones. The content is lower than veal, but there is a great deal available in beef bones so for me, the question is mute. No guilt. That works.
There is also the fact that an older animal will likely have better flavor due to age and activity (within reason). This reasoning is also why I like some cuts of beef over others as activity means flavor (short ribs), inactivity means tenderness and lack of flavor (tenderloin).
So here we go.
Set the oven to 375-400F. Put the bones in the roasting pan. Place the roasting pan into the oven and walk away for about 45 minutes to one hour.

When you check in on the bones give them a stir, what you are looking for is an even caramelization of the bones, an even browning so that they are all more or less the same nice brown color.

This should take about three to four hours. Check them every 45 minutes or so in case your oven temperature is not accurate. Set a timer so that you are able to do other things rather than stare occasionally at the oven. My bones today were in the oven for about three and a half hours.

Once you have a nice brown color on the bones. Pull the them and get them going in the stock pot, fill the stock pot with cold water, as cold as you can get. I have even used ice to get the temperature of the water way down, while I roast the veggies. The goal here is to extract the collagen. I don't know why roasted bones will still give up the gelatin in cold water while raw bones will not in hot water. Maybe it's a "god thing" as one of my culinary instructors, Chef Patricia Hart (no relation) used to say.
Remove any accumulated rendered fat from the roasting pan.

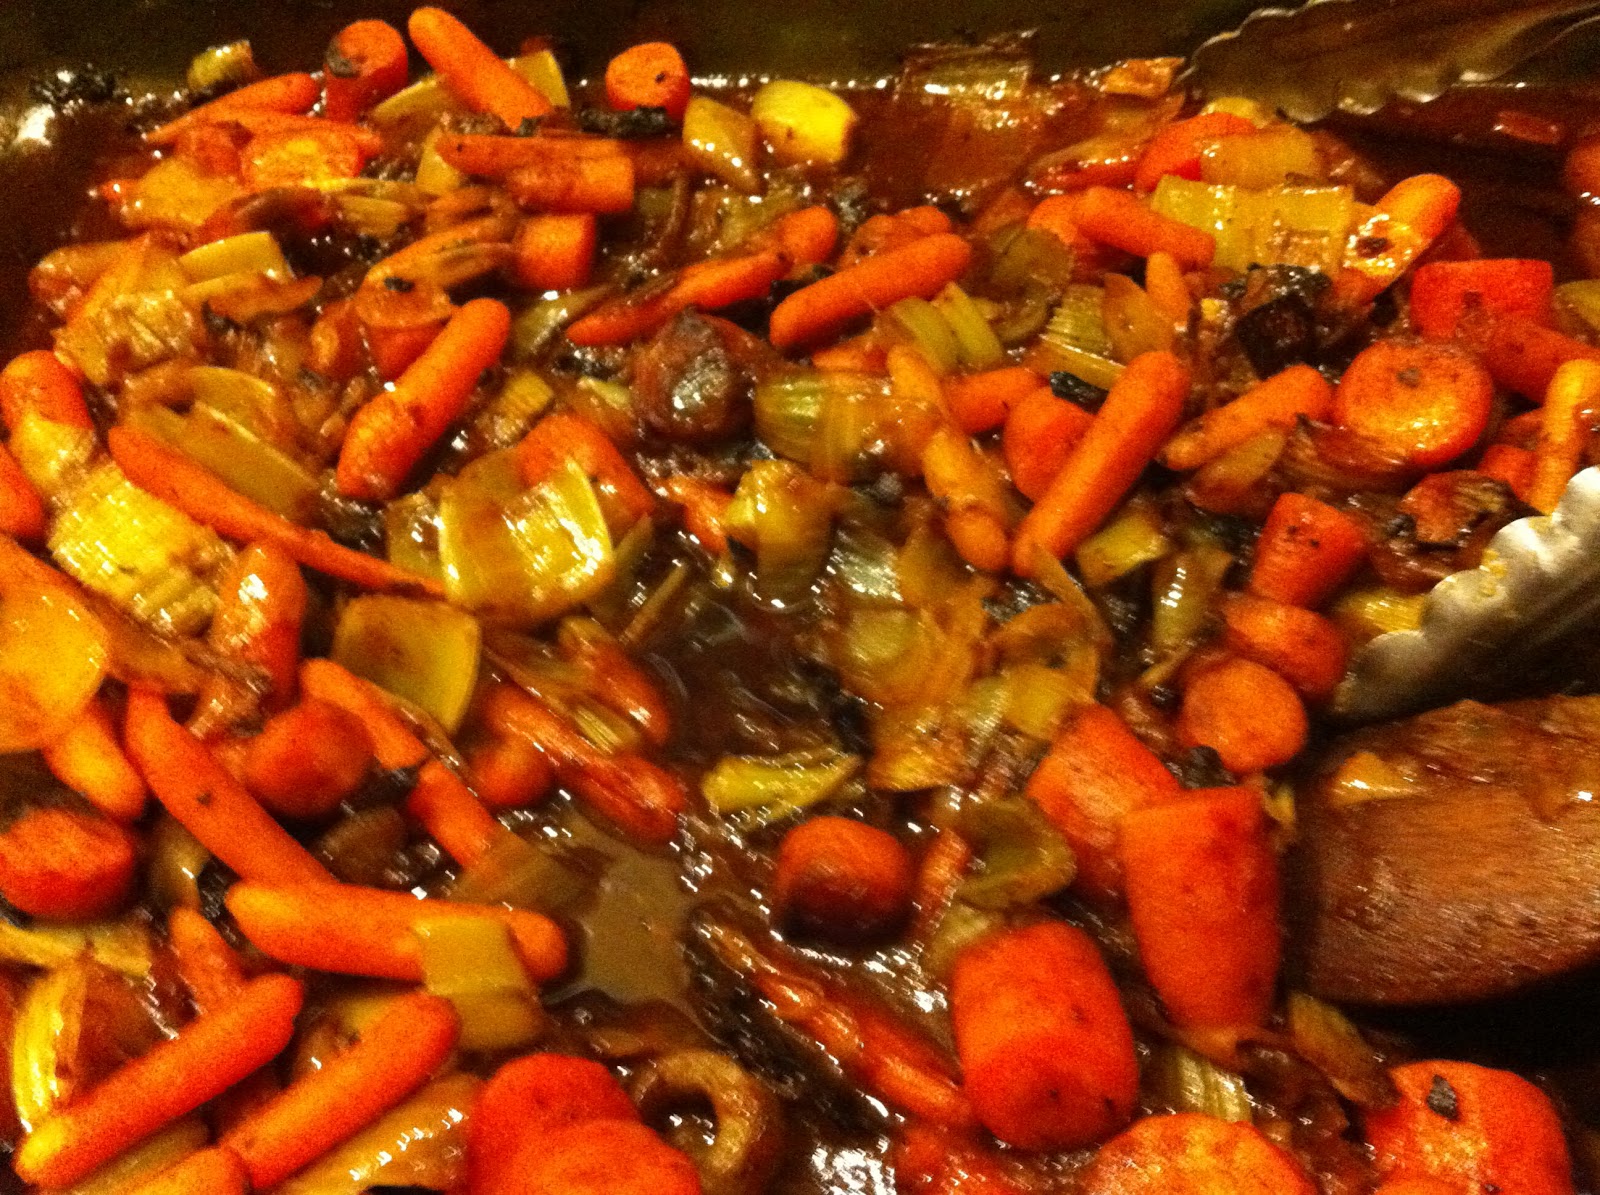
Pour your mirepoix into the roasting pan and add the tomato paste (Or any other tomato product you have. Be careful that you mind the amount of tomato that you add as too much will give your stock a reddish quality) and mix it into the veggies.

In culinary school they always called it "tomato product" which confused me because every chef instructor used tomato paste. It was only later that I realized that they were talking about any tomato product. I have used fresh tomatoes and canned for this as well.

Check often on the mirepoix and give them a stir from time to time to achieve some even coloration, we're looking for brown, not black here.

While the veggies are roasting turn on the burner under the stock pot to its' highest setting and bring the contents to a boil. Once you have achieved a boil reduce the heat to a simmer immediately. As with the chicken stock, you want to remove the foamy gray stuff that will accumulate at the top. In school this was called removing the scum. I don't like to mention my food and scum in one sentence, so this will likely be the last time. Also at this time and throughout the simmering process, remove what fat you can from the surface of your stock.
Check on the roasting pan to the oven. This time we're looking for some caramelization of the vegetables, a little browning to take place. Continue to check in very 20 minutes to stir things up!
Every half an hour or so, go in there and stir the mirepoix. Forty five minutes or so should do the trick. This will vary depending on the actual temperature of your oven.
Remove the pan from the oven and put the contents into your stock pot. Deglaze your pan with red wine, again, if you won't drink it, don't cook with it. Use an inexpensive red, but not one you would not drink. Quick point of clarification on this one I made today, we has red wine around that we would drink, but didn't want to use it for the stock, so today I used a rose champagne that was left over from a few days ago and had lost enough of it's bubbles that it was sacrificed for the stock.
The mirepoix looks like this:
Place the roasting pan on the stove, turn on the heat to medium and add either water or more red wine and scrape the pan to remove whatever is adhering to it. Pour all of this into your stock pot. Than’t some of your flavor and color that is so important to a good brown stock.
Remember, if you allow the stock to boil for a long time, you will end up with a cloudy end product, guard against that!
I simmer my beef stock 8-12 hours. This may be overkill, but I like what I get at the end. Eight hours should be the absolute minimum. Remember, we are working with much more significant bones than we did with the chicken stock, give them time to give you all that they have.

Next we strain the same way we strained the chicken stock. A chinoise is best, but use what you have. Bailing with a 2 qt sauce pan makes the process a little easier.


Divide the stock into smaller containers for freezing. These smaller containers give you the opportunity to use your stock more frequently.

One last step, if you have the freezer space, once you have drained the stock from the pot, fill it again with cold water and bring it to a boil. Strain again and hold/freeze that liquid in a large container to be used as your water next time. This is called a veal wash, or beef wash with our situation. This gives your next stock a leg up to become the next big thing.
And those bones that are left over at the end of this process, if you have a dog, I am sure he/she will not fault you for giving them to him/her. My pooch will be one happy guy in the morning!

No comments:
Post a Comment