Sunday, April 29, 2012

My French Rillettes Inspiration

On our last trip to France, almost three years ago, we attended the wedding of a dear friend. The wedding was amazing and fun. The food was exceptional.

The wedding took place in a little town called Blain. The reception was at the home of our friends grandfather. Home is too modest a word for where he lived. In reality it is a "mini-chateau". Grand by American standards, mini when compared to the chateau of the Loire Valley.

At the reception they had a seared a bunch of wonderful hors d'oeuvres stations placed throughout the grounds of the estate, they even had a foie gras station, I was in heaven.

The whole event seemed like it was out of a story book.

We were invited to have brunch with the family the next day, which we felt was an enormous honor. One of the dishes served at brunch was the most amazing goose rillettes. Wow! I'd eaten rillettes a few times on this trip and had even made some at home, but this stuff was like none I had ever tried.


The flavor was wonderful, the texture is what made it.

I had made rillettes once before this trip, but until I tasted that goose, I thought my attempt had been pretty good.

This stuff raised the bar.

I resolved that day to make rillettes again and do a better job on the texture.

When I started to make this batch, I decided to have it entirely hand made. In the past I had used a mixer to break up the meat and the final product was too fine and the texture and taste paled in comparison to the stuff at brunch.

Since I have never in my life had enough goose legs "lying about" to have a go at rillettes, I resolved to make my next run with pork.

I searched my cook books and the Internet for a suitable recipe and all of them had what I considered a fatal flaw or two.

This recipe is a marriage of four or five with some adjustments thrown in throughout the cooking process:

2.5 lb pork shoulder (pork butt)
1/5 C Calvados (or apple brandy if that is what you have)
4 Bay Leaves
6 Thyme stems with leaves
10 Black Peppercorns
4 Juniper Berries
1.5 C Goose Fat (Lard will work just fine). See below.
2-3 C Rich Chicken Stock


Cut the meat into small cubes and place into a large stainless steel or glass bowl. 


Grind all of the spices in a spice grinder or mortar and pestle. I use an old coffee grinder. Be sure that you continue until all of the spices are powdered.


Pour the Calvados and spices over the meat and mix well. Cover the bowl with plastic wrap or other reasonably tight fitting lid. Refrigerate for at least 8 hours and as much as 24. It will pick up more of the flavors with extended time.


A quick note about Calvados. It is delightful stuff and usually is consumed or used in recipes in smaller amounts. I just happened to have a bottle in the liquor cabinet that I think I bought when I visited my brother in Utah in the 80's. Otherwise I would have probably used a less expensive (but as tasty as possible give the budget) apple brandy.

Heat your oven to 225-250F.


Brown the meat in batches in a sauté pan with the lard. I used goose fat as a friend gave me a small container for Christmas. Really. And I was thrilled to get it too.


When the meat is browned add it to a roasting pan. Continue browning until all of the meat has been browned.


Add some chicken stock to just cover the meat and the rest of the fat and cover tightly.

Cook in the oven for three hours or so. The meat should be tender and come part easily.


Let the meat cool in the liquid until it can be handled. Remove it from the liquid and break it up with your hands and put into a large bowl. 


Make sure not to shred it too fine as the texture will continue together smother as you adjust the seasoning later and remember, texture is super important. Taste the meat and add some seasoning to adjust if necessary (don't mix it yet)


Start adding some of the cocking liquid back to the meat once it's shredded. Moist is great but it should not be soaking. Mix the liquid in. Taste it again. You should good to go, but if you need to add more seasoning, go ahead, but be carefully not to break the meat up any more than necessary.

Pack the meat into ramekins or jars leaving about 3/4" room at the top. Refrigerate them until cold.

Strain the cooking liquid and pull the fat from the top. Pour a little of this on top of the rillettes, about a 1/4" and back to the fridge.


Once the fat has set up, close the lids. Keep them in the refrigerator. They will last a long time in there protected by the fat. Once you open one and break the layer of fat, you should eat the whole thing in a few days. I usually serve mine with a nice baguette or good crackers.


That should not be hard to do though as ours usually only last an hour or two -even if the bread runs out!

Wednesday, April 25, 2012

Fried Southwestern Oysters in Chipotle Cream


One of the dishes that we served at our restaurant in San Francisco was a southwestern fried oyster concoction that is quite possibly one of my favorite creations of all time.


More succinctly, one of my favorite creations that I came up with, there are a great many that I love dearly that other folks have created as well!  That list is enormous.  I should compile it one day.
 Southwestern Oysters with Chipotle Cream was a thing of beauty.  Sometimes when we make a dish and eat it, my wife and I will say to each other, "why don't we make that more often?". This is one of those.  I think that I make this one about twice a year at this point.  When we had the restaurant, it was more like 10-15 times a day.

I am a believer that with oysters, size matters.  For me they need to be small to medium in size.  I have called large oysters "loogies"  for a long time.  I firmly believe that an oyster needs to be one bite.

One time for our anniversary we stayed at the Fairmont in San Francisco and dined at the restaurant in the hotel where I worked and the kitchen sent out an order of oysters that they had "hand picked" for us.  Ugh!  It was the only time I have used a knife and fork on a raw oyster!  These boys must have been 4-5 inches long.
Also, they need to be as fresh as possible.  I would rather shuck a beautiful oyster and make this dish than get a jar or other container of usually enormous oysters and try to make due.
I am also of the mind that nearly any oyster that comes pre-shucked is something to be avoided.
So let's get started.
The SW oysters were served in a small square cast iron pan that was heated in the oven prior to the ingredients being loaded into it.  One of my ovens in the restaurant was dubbed the "volcano" as there was no temperature control.  It just blasted heat!  Must have been at 500F+ all the time.
Here is a list of your mis-en-place:
Cast iron pan (or a small shallow bowl)
Three small oysters
Double Cream (recipe below)
Blanched spinach
Pearl onions
Chanterelles 
Chipotle powder
Kosher salt
All purpose flour (since my family is gluten free, we use rice flour)
To make the double cream, pour some cream into a sauce pan and reduce on the stove by about half.  It does not make much sense to start with less than a pint as you will need about three ounces for each order.  We usually started with a gallon.


Bring the cream just to the point of boiling and reduce to a simmer.  Use a pot that is much larger than your volume of cream as it will overflow if it is given the slightest chance.  Today my pan boiled over twice!  Reduce the total volume to about one half and set aside.
The double cream can be done well in advance.  It will last many days in refrigeration.  If you make it in advance, let it come to room temp when you are ready to make this as it is very thick when cold.


Peel your pearl onions and blanch them. You'll need about four per plate.


Blanch your spinach in salted water, let cool and squeeze as much moisture out of it as you can.


Prepare the dredge for your oysters.  About a cup of flour, 2 table spoons of chipotle powder and 2 teaspoons of kosher salt.  I went a little overboard with the chipotle powder today.  Your dredge mix will undoubtedly look a little lighter in color than this. 


Shuck the oysters, 3 per plate.


To make the dish you'll need a sauce pan with oil in it for frying.  I use a 3 qt pan with about two cups of oil.  Turn on the heat and start to bring it to temp. 375F is pretty much standard for frying.

While the oil is heating, put spinach, pearl onions and some double cream into a sauté pan - heat on medium.  Use about 3 oz of the cream for each order.  Season with chipotle powder and kosher salt, about a pinch of each.  When it begins to almost boil, the oil should be just about right.


If you don't have a thermometer for the oil a wooden spoon will do the trick.  When you insert the handle of the spoon into the oil, if the temperature is right, it will bubble like fine champagne.  Tiny bubbles that is...
Once the proper oil temperature has been reached, dredge the oysters in the flour and place them in the oil to fry. 


They will take about 1.5 minutes to cook completely.  Remember to make sure that you roll them over so that they cook evenly.
While the oysters are frying, pull your little cast iron pan from the oven and place it on a plate with a folded cotton napkin beneath the pan.
Pour the cream mixture into the pan and arrange it so that it is attractive and then place the oysters in the cast iron pan.  If you don't have little pans for this, a small shallow bowl will work for the presentation.  I have found that plates don't work as well for me as they often will not hold enough of the cream for my taste.  


I also serve this dish with fork and spoon as I find that most of my guests will eat the sauce like soup after the oysters and other goodies are gone.

Wednesday, April 18, 2012

Creme Brûlée: Simply Sublime


I worked at the Fairmont Hotel in San Francisco in the mid nineties with a group of really good cooks and a chef, Michel Veron, who taught me among other things, how to run a kitchen and how to treat your staff.


Our team in the kitchen was a diverse group of people.  We had Filipinos, Chinese, Caucasians, African Americans and Central Americans.  A band of real characters.  The Filipinos were Max and Romy;  the Chinese were Kan, James and Hauley; the Caucasians were me, Tom the sous chef, Michel the chef, Mary and a bit of a revolving door of others, Will our african american member of the staff and Carlos the lone Latin member, at least on the back floor.
I will share stories about most of them in the future, but today is about Kan.  Kan was from Hong Kong and with his brothers owned a 500 seat dim sum restaurant in HK with his brothers.  I think Kan was somewhere in the neighborhood of 65 years old and was responsible for the sweet side of the pantry.
He was blind in one eye and had been working on Nob Hill for something like 28 years.  To look at him you would think he was just a regular guy.  He wore an old Greyhound bus jacket that I think he must have picked up second hand.  It was the restaurant in HK that set him apart.
Apparently the place was busy, very busy.  Although he seemed to spend no money at all on himself, he lavished his family with amazing gifts.  It seemed so unreal to me that such an unassuming guy would buy luxury cars for his children and his wife while he continued to wear his beat up bus jacket.
I think that at a time when cooks and chefs were starting to get out of control with their egos that this guy stood apart.  He was gifted in the area of the pastry department.
He made delightful soufflés, and the most amazing Creme brûlée that I had ever tasted at the time.
Here is his recipe:
1/2 gal manufacturing cream
1/2 gal 1/2 &1/2
28 oz granulated sugar
20 egg yolks
3 vanilla beans (split and scraped)
I asked him for his recipe and asked if I could use it.  He told me that I could, but as I worked later as a chef, I felt that it needed to be altered for my taste.
I changed the recipe to this for my restaurant:
1/2 gal manufacturing cream
1/2 gal 1/2 &1/2
21 oz granulated sugar
20 egg yolks
3 vanilla beans (split and scraped)
I found that for my taste that his recipe was a little too sweet.  When I dropped 7 oz of sugar from the recipe, it was right where I wanted it.  This took about 6 months of adjustments to get to the right amount of sugar.
What I loved most about his Creme Brûlée was the texture.  This is one of the reasons that I rarely if ever order it when I am out in a restaurant.
Almost no one I've experienced the work of has made a better brûlée than mine (a variation on Kan's recipe), and therefore I am usually disappointed.
Today I do not need a gallon of base, so I've cut it down a bit:
1 pint cream
1 pint 1/2 & 1/2
5.5 oz sugar
1 vanilla bean
6 egg yolks 
I have also changed the method that Kan taught me in a few parts of the process.  So here we go:

Separate the yolks from the whites of the egg.


Combine the egg yolks and sugar and mix with a wire whip.  


Be careful to just combine the two, they should be a very "yolky yellow".  Set aside.  Be careful not to whip it much, just get it to combine.  If you over whip the egg and sugar mixture, the texture suffers.


You will know it is whipped too much if the color lightens and becomes more of a pastel color rather than a rich, bright yellow.


Split the vanilla bean in half lengthwise and scrape out the seeds.


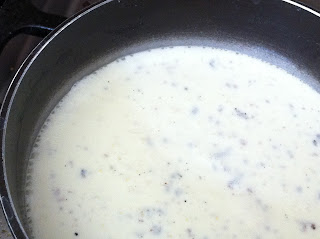
Place the cream and 1/2 & 1/2 and vanilla bean in a sauce pan and scald.


Scalding is when the first little bubbles begin to form on the sides of the pan.


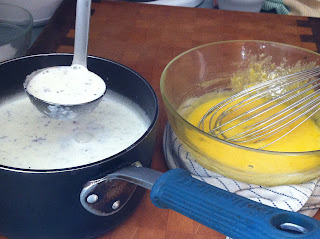
Now it's time to "temper" the eggs.
The point of tempering the eggs is to add the hot cream mixture to the egg yolks and sugar without cooking the egg yolks.  When you are doing this it is important to to be  vigorously stirring the yolks with your whip as you add the cream.


Once you have incorporated enough of the cream to make the eggs very warm add the eggs into the cream while whipping the hot cream vigorously.  


Turn the heat back on and cook while stirring to prevent the eggs from"scrambling".  Once the mixture has thickened to a texture like a melted milk shake, remove it from the heat and immediately remove it from the heat and pass it through a fine strainer like a chinoise.


Cool the final brûlée base in an ice bath.  Continue stirring to get the mixture to cool completely.


Refrigerate until it is cold.

Pour into ramekins and bake in a water bath at 250F.  


This is going to take a lot longer  than you want it to.  But the final product is worth it!  This can sometimes take more than two hours.  Trust me it's worth it!
The custard is ready when it barely quakes in the ramekins when you lightly tap them in the oven.


When the brûlées are done, cool to room temp and then refrigerate them.  I like to get to this step at least a day before I serve them.  You can go as long as three days in the fridge, but liquid will form on the top of the brûlée.  It is also helpful to wrap them tightly with plastic wrap individually once they are very cold.
At service time, remove any liquid that may have formed on the top of the and the dust them with granulated sugar. 


Caramelize with a blow torch or other similar tool.


This also makes an excellent vanilla ice cream, better than most that are available in the store.

Monday, April 9, 2012

Shredded Chicken Enchiladas


I love shredded chicken.  To be honest, I love shredded meats in general.  I don't care if it is chicken,  pork or beef. 


To be honest, I didn't really try to shred meat for almost 20 years after I first tasted it and fell in love with the flavor and texture, what a missed opportunity!

 I think this probably stems from my mother telling me how difficult it is to make them when I was a child.

I don't think that it has become more difficult in the last 30 years but that was he line on it anyway.  I find it very easy although a little time consuming.

Maybe that was the difficulty.  The time necessary to achieve this sublime, tasty item, may have been the sticking point.  I'll ask her.
Let's get to work.


First I break down a chicken just like I did in my earlier blog.  I filmed it again this time and although I am not totally happy with the video due to two close-up moments with my elbow (boy do I need a tripod taller than three inches!), but I wanted to show you how quickly this can be done.  Here is my video of the process, again, sorry for the elbow.


For this dish I don't feel it is necessary to separate the thigh and drum stick it is easier to remove the skin when they are still attached.  The skin will not add much flavor for this dish, just rendered fat which is not my goal tonight. 


Place the breasts and legs into a pan with some onions and crushed garlic for a bed to protect it from the heat of the pan.  


Add some green chili sauce, 


cover tightly with foil and place in a 300F oven.


After 2 hours or so, check the meat to see if it is tender.  Be careful opening the foil lid as the dish will steam.  If you have ever had a steam burn, you'll know what I am talking about.  If you haven't, take my word for it.  No fun!


Once the chicken is tender, I check by pushing down gently with my finger on the thigh portion of the leg, if it gives easily it is ready.
Remove from the oven and let stand uncovered to cool.

The shredding process is easier when the chicken is still warm.  I did not have time to do it then so mine was refrigerated overnight and thus when I shredded it cold, it wasa little more difficult, but certainly what I would call a simple process.


Pull the meat from the pan and transfer the remaining contents of the pan to a stock pot and bring it to a boil on the stove.


While you are cooking the sauce, shred the chicken with your hands.  It turns out that my mother's issue with shredded meat is that she thought that it needed to be done with two forks and not with your hands.  I have used the process and it is much more time consuming.

At this point I add Cotija cheese and cheddar.  


Cheddar is not really part of Mexican cooking unless you are in the United States.  There is no cheddar in Mexico unless they are catering to the American crowd, but Cotija is a traditional Mexican cheese that is absolutely delicious.  Crumble the cotija and grate the cheddar and add to the meat.


Once the sauce is boiling, purée it with an immersion blender (or a regular blender if you don't have an immersion blender).  However, if you use a regular blender, cover the top of the blender with a kitchen towel and hold the lid on tight before you hit go.  The hot liquid will force the top off and put your sauce on the ceiling if it is not contained.


I add some of the hot sauce to the filling mixture and incorporate it.  Check it for seasoning and set aside.


I have a flat cast iron skillet that my mother-in-law gave me some years ago that I use to prepare the corn tortillas for the enchiladas.  


I add some oil, again a 25-75 extra virgin olive oil to canola blend, and fry the tortillas.  You want to use enough oil to make the tortillas very pliable.  If you use too little, your tortillas may be brittle and will break open when you roll them.


Since this is definitely not a diet item, best to go a little heavy than a little light on the oil.
Time to make the enchiladas!
Ladle some of your green chile sauce to thinly cover the bottom of the baking pan.


Finally!  I use 8" corn tortillas for this on, so I place a little more than a quarter cup of filling onto the tortilla and roll it like this:


Line them up as you roll them.  Not too tight, but not too loose either.  My recipe tonight made 22 enchiladas.  


Place a thin layer of your sauce on top and grate some cheddar and Cotija.  Bake at 375F for about 20 minutes as long as the dish is at room temp.  If the dish is coming out of the refrigerator, it will take a bit longer, maybe 15 more minutes  in the oven.


This recipes can also be prepared ahead of of time and frozen for a quick dinner and it turns out fabulously.  The cooking time would need to be adjusted for a thawed pan of enchiladas.